How to Make a Spore Print
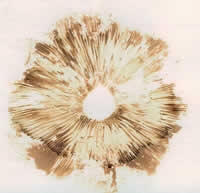
Mushroom spores are very small and can only be seen individually with a microscope. On a mature mushroom, many thousands of spores grow on just one gill or on a small piece of a mushroom. In order to see a group of spores and also the color of the spores, we can make a spore print. Spore color can range from white to many other shades, including black.
Here are some ways to make spore prints:
Mushrooms with gills: The spores lie on the gill surface. Cut off the stem and place the cap, with the gills facing down, on a piece of aluminum foil, a white piece of paper, an index card or a glass microscope slide. Put a drop of water on the top of the cap to help release the spores. Cover the cap with a paper cup or glass and leave for 2-24 hours, depending on the humidity and the freshness of the mushroom. The spores will fall on the paper, foil or glass, making a spore print pattern. If you have only one specimen to study, just use a portion of the cap.
If you don’t want to separate the cap from the stem, make a hole in an index card, place the card on a paper cup and slide the stem of the mushroom through the hole until the underside of the cap is resting on the card; then proceed as above.
When collecting in the field or woods, you can take along some sheets of aluminum foil in your collecting basket, place the mushroom cap on the foil, and enclose it, together with the rest of the mushroom, in the foil. You might have a spore print when you return home or to your school.
Mushrooms with pores: If the mushroom has a stem and is soft and fresh, such as a bolete, the spores will be inside the pores underneath the cap. A spore print can be made in the same way as for a gilled mushroom. Your spore deposit will reflect the size and shape of the pores.
If the mushroom is hard, it is more difficult to obtain spore prints from polypores growing on trees or logs. Some polypores take a long time to mature and produce spores. Also, the mushrooms can often live a long time after they produce and disperse their spores. Try wrapping them in wet paper towels or newspapers overnight before putting them down on foil, paper or glass to make a spore print. Note that the spore bearing surface always faces down toward the ground as the polypore grows.
Mushrooms that have other forms: There are many other forms of mushrooms such as morels, hydnums, corals, puffballs and birds nests, to name just a few. If you find these different mushrooms, experiment or consult a mushroom book to locate the spores.
To study the spores with a microscope: Scrape off some of the spores from your spore print with a needle or scalpel, and place the spores on a microscope slide. Place a drop of water on the spores and cover with a cover slip.
To preserve your spore print: Spore prints can be preserved on paper or foil by spraying them lightly with an artist spray. Hair spray works well, too!
If you’re feeling artistic, why not let the spores “float” down onto the paper in patterns resulting from air currents in the room? Place the cap of the mushroom on card stock or colored paper without covering the cap, and see what happens! These surprises make appealing greeting cards, business cards or even beginnings of cartoons!
If you already know the color of the spores, pick a colored paper that will highlight the spore color. Many drop white spores, some are black, brown or cinnamon colored.
Ink caps (Coprinus comatus or other Coprinus species) will drop a surprising amount of black spores: leaving them overnight could provide you with enough to make ink: scrape them into several drops of water, and you could write a message about what you’ve just done.
As you read on the previous page, each mushroom genus will offer you sizes, patterns and colors to play with. Again, using artist “fixative” (or simply hair spray), you can “fix” the spores permanently.
Caution: Hold the spray at least 12 to 15 inches above the print or you may blast the spores right off the paper!
Sandy Sheine and Maggie Rogers
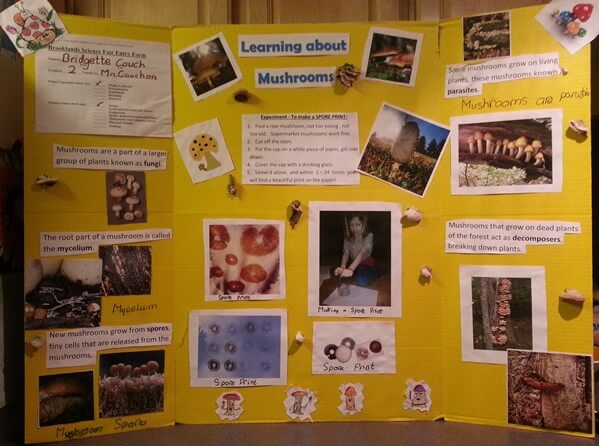
Entry for Second Grade Science Fair by Bridgette Couch.
Teacher: Ms. Cauchon
School: Brooklands Elementary School, Rochester Hills, MI
NAMA Store >